Monday, January 17, 2011

Corey:2011 High School Senior

I'm sure you remember Taylor, well meet her brother, Corey! I was able to shoot their sessions together which made it easier on all of us- unfortunately for them we had to start bright and early on a Saturday morning (I hate doing that to high school seniors, I remember how much I loved sleeping in on Saturdays!). We started in one of my favorite spots around Longview's old dock, then we headed down to Westport and Corey got his guitar out..and his awesome shoes that were custom made for him (http://www.evolved-footwear.com/).  Thanks to StreetSide Records for letting us shoot inside (and use their bathroom for outfit changes! :). Here are some favorites from our session, you can see more at my facebook fan page...


Tutorial!

I know that this is a photography blog, but I have used it for personal posts too and I had some requests on how to make this ruffle shirt:


I couldn't find another shirt to add ruffles onto..but I can show you how to make some ruffles :)

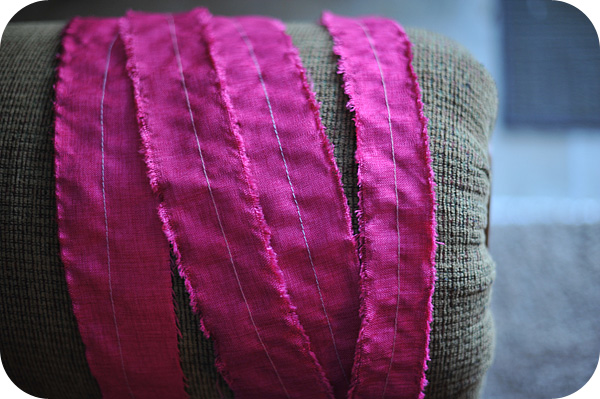
Frayed Ruffle Tutorial
_____________________________
  
Step 1. Get some fabric and scissors!
Step 2: Cut about an inch into the fabric, however big you want your ruffles to be. For this I did different sizes.

Step 3: Rip the fabric starting where you cut it- it might be a little tough depending on your fabric


 Step 4: To fray the edges you just pull the sides with your fingernails. You can do as much as you'd like.
Step 5: Now get your sewing machine ready and set it to a loose stitch- I did the last one in the "6" group

Step 6: Sew a straight line down your fabric and leave some extra thread hanging off the edge

Step 7: Take one of the strings from your stitch (doesn't matter which one) and start tugging at it and inching the fabric down. So far I haven't had any trouble doing this but if it gets sticky you can turn it around and start pulling on the opposite end.


Voila! You have a ruffle! I used these ruffles on a pillow and it looks really cute! I'm obsessed with them considering how easy they are and you can add them to anything! Also, I got this fabric from walmart for $5 for 5 yards. Our walmart got rid of their fabric section and they still have some bolts on clearance. You can't beat that!


Monday, January 10, 2011

Wedding Changes

My photography business has become a big part of my life over the past few months, and looking ahead to this next year Nathan and I have decided we have to make some changes. I have already booked 11 weddings for 2011 with at least 3 more prospects. I had decided to take on 17 this year so that I could still have time for families, newborns and seniors, and that is still the plan. That sounded like a good idea to me, but tonight I have been researching how much money I will be making as compared to the time I will be spending (no one realizes just how much time goes into one wedding:the day of, the hours and hours and hours of editing, the designing the albums and dvd's and thank-you's, it's a huge process) and because of that we have decided that my wedding packages will be changed. The good news is that I still think you will all be getting what you want- coverage of your wedding, lots of images (all edited by myself) and the disc with the high resolution images and copyright release. I guess I did some bad adding when I first put my packages together because one of my weddings this past year I actually ended up paying out of pocket to buy the products. Not good :)  There will still be one package with all the frills, and you will still be able to purchase all of the awesome products from me at GREAT prices. New packages will be available starting tomorrow!

2011 Brides that have contracts with me/have contacted me before 1/11/2011 this does NOT affect you!